Well, it has been forever since I posted about 3D printing and "enhancing games" (or anything about anything really, but I digress). At any rate... let's talk about
Arkham Horror: The Card Game. I mean sure, here is a game that is 98% cards (the other 2% being a handful of cardboard tokens), so there must lots this game needs in the way of 3D printed things and other enhancements.
Well as
MAGOs know, there should be sleeving! That is a little obvious I think. Maybe you don't think so, but knowing that you'll be shuffling cards and then adding
new cards as you progress, I think this is a game where being able to hide the wear on cards to keep from knowing new from old is a reasonable case for sleeving. Yeah, you can probably skip the location cards and such and really just keep it to the player deck cards, but whatever works for you.
Whether you choose to sleeve your cards or not, the next question is - do you upgrade the cardboard tokens? Here you have a couple of different options, depending on how much you want to spend. The Broken Token sells
acrylic replacements, as does
Covenant (and I'm sure there are others too). The Covenant ones are really nice and their player tray sort of sparked this post - I'll get to that in a minute. I already have a nice set of wooden tokens (for Eldritch Horror, but same tokens) from The
Meeple Source that I can use, so I am sticking with those.
Of course, there are also the tokens for the draw bag/cup. The
GeekCraftShop (again, and others I'm sure), sell custom bags that are both nice and thematic. I actually prefer a digital upgrade here. There is an app called the Arkham Bag (
iOS and
Google). As far as I know, the app is free on both systems. The Arkham Bag is literally an app that emulates the token cup, eliminating the need for the actual tokens in the convenience of your handheld device! The app is easy to use and while some may not like electronic intrusion, I don't mind in the least.

So, let us go back to the cards for a minute. You would think that a (mostly) card based game would provide you with a large box and insert to hold everything (like say the Pathfinder Adventure Card games). Well, FFG went the route of smallish box (and the expansions in smaller boxes or blister packs) with no real insert. I could buy one or make one from foam core, but when it comes to making box inserts, 3D printing is the way to go (if you have access to a printer). It is a bit more time consuming than just heading over to [insert your favorite organizer seller] and buying laser cut wood organizers, but you can regularly find all kinds of designs and print them on your own - relatively cheaply from
Thingiverse. I found
this cool set of insert pieces that fit in the original box. The original design was not made to hold sleeved cards, so I simply widened the card boxes a little and shrunk the width of the middle bins by the same amount to accommodate my sleeved cards.
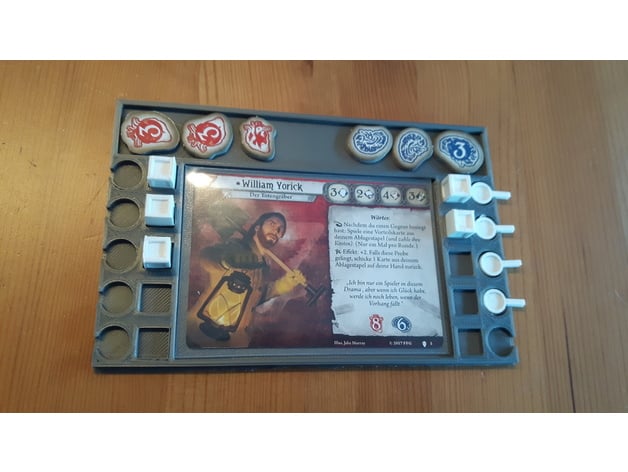
While searching Thingiverse, I also ran across this
nice player tray. It isn't really necessary, but I like the look and idea of it (I need something like this more for Eldritch Horror, but that's a different story). The character card goes in the middle, the columns of squares to either side hold the little resource cubes and the outside hold the magnifying glasses (clues) - all 3D printed of course. The bottom (or top if you spin the tray) hold the health and sanity tokens you have. Maybe not as nice as the Covenant one that got me going on this today, but decent enough (and really a small amount of printing material and a couple hours of printing) that I don't mind not shelling out a ton of money.
And in the category of - I didn't know I needed that!
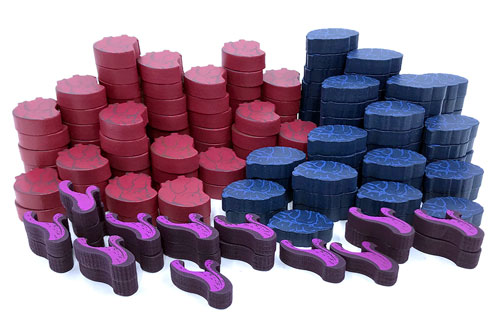
Arrows. A buddy of mine pointed out that having some arrows to point between the locations would be nice to make it easier to figure out travel in the game. I found some, though when I started setting them up to print, I found them to be a bit large. I don't really want to spread out on the table that much. So I shrunk them down so that they were only about 70% as long and 80% as wide. Perfect.
For those that are curious about how to change the sizes - it is pretty trivial. Typically, the files you find for the various print items are some sort of shape file - what you would get from 3D modeling programs. In order to print on your printer, you have to run the shape file through some other program that turns each shape into a set of instructions for the printer so that it can print each layer of the object. Remember, 3D printing is like making a 3D object from toothpaste - you lay down a thin layer of material and after it has hardened, you can build the next layer on top of that and so on. The software I use for our 3D printer is called Slic3r (I guess because it turns the 3D objects into slices). After adding a shape object to the print area in the software, there are a number of options for rotating and resizing the objects. It really is that simple - all you have to do is pick the correct axis to stretch. For stretching boxes that hold non-sleeved cards, it is just a matter of adding about 2-3mm in width. I simply got out a ruler and started doing some basic math. Easy Peasy.
And her is one more shot of the completed printed player board and the little resource cubes (crates) and magnifying glasses. Can't wait to play again.
Hey - that's it for this round of bling my game! Be sure to check us out at PunchBoard Media!

/pic3122349.jpg)


No comments:
Post a Comment